Waterproofing a NYC Terrace or Balcony — A Step-by-Step Guide
Few amenities are more valuable in a NYC apartment than a private outdoor terrace. Few things cause more co-op board headaches and lawsuits than that same terrace leaking into the unit below. Terrace and balcony waterproofing is one of the most misunderstood — and most often poorly executed — parts of NYC building maintenance.
This guide explains where terraces actually leak, what a proper waterproofing system looks like, and how to navigate the permitting and political landmines that come with outdoor work in multi-unit buildings. We've waterproofed terraces in pre-war buildings on the Upper West Side, brand-new condos in DUMBO, and everything in between, and the same principles apply across the board.
Why terraces leak
Almost every terrace leak originates in one of four places: the membrane itself, the perimeter flashing where the deck meets walls or parapets, the drains, or the door threshold. Of those, perimeter flashing is by far the most common culprit. The transition between horizontal deck and vertical wall is where the membrane is most stressed, and where shortcuts during installation come back to haunt the owner.
Most terrace leaks don't show up until after a heavy rain combined with wind, which is why diagnosing them is part forensic work. Water can travel six or eight feet horizontally through a slab before showing up on the ceiling below.
Why patches fail
When a terrace starts leaking, the first instinct is to caulk or patch the visible crack. This almost never works long-term. The membrane below the tile or pavers is what actually waterproofs the terrace — the surface you walk on is just protection. A surface patch addresses a symptom, not the cause. Within one season, water has found a new path and the leak returns, often worse.
What proper waterproofing looks like
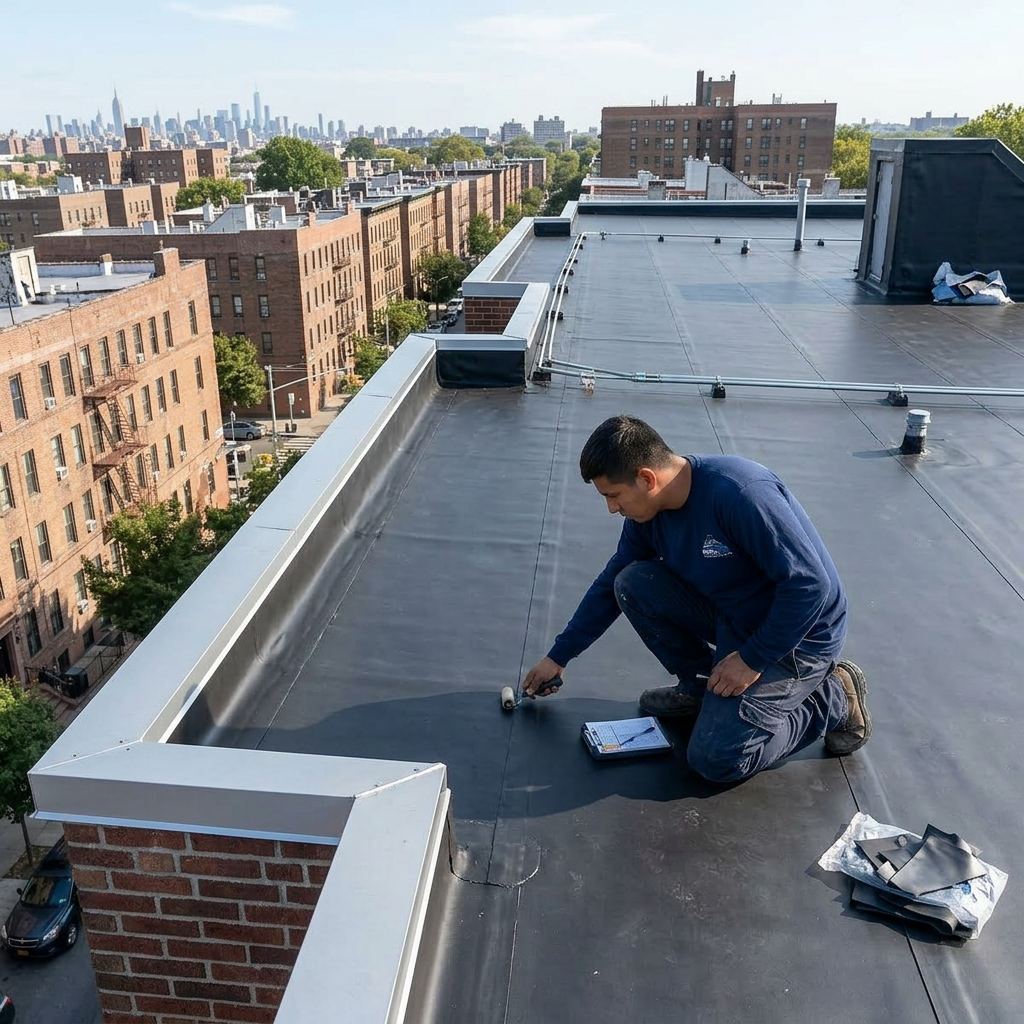
A correctly built waterproof terrace is a complete system. Each layer has a job, and skipping or shortcutting any one of them will cause failure. The image below shows our crew applying a liquid-applied membrane on a Manhattan terrace mid-project — that gray surface will be the actual waterproofing layer once it cures, with pavers installed on top of it later.

Step 1: Demolition and substrate prep
All existing pavers, mortar bed, and old membrane are removed down to the structural slab. The slab is then inspected for cracks and proper slope toward the drain. Any structural repairs happen now.
Step 2: Slope correction
A terrace must drain. If the slab is flat or pitches toward the wall, a sloped concrete topping is poured to direct water to the drain at a minimum 1/4 inch per foot. Skipping this step guarantees ponding water, which guarantees future failure.
Step 3: Liquid-applied membrane
A fully bonded liquid-applied waterproofing membrane is then installed over the entire surface. The best products are polyurethane or polymer-modified cementitious systems that bond directly to the substrate, eliminating any space where water could travel sideways. The membrane is brought up the parapet wall at least 8 inches and integrated with new flashing.
Step 4: Reinforced detail work at all transitions
Every drain, parapet base, door threshold, and penetration gets a reinforcing fabric embedded in additional membrane. This is where most failures happen, so this is where the most care is taken.
Step 5: Drainage layer
A dimpled drainage mat or pedestal system is installed over the cured membrane to allow water that gets through the surface to flow freely to the drain rather than sitting against the membrane.
Step 6: Wear surface
Pavers on pedestals are the most common modern choice because they allow access to the membrane below if any spot ever needs repair. Mortared tile is more traditional but harder to repair.
Drains and door thresholds
The drain assembly is the single most important detail on the entire terrace. A good system uses a clamping drain that captures the membrane mechanically, ensuring water that reaches the membrane is delivered into the drain rather than past it. The door threshold should sit at least 4 inches above the finished terrace surface to prevent water from blowing into the unit during heavy rain.
Permits and co-op approvals
In any multi-unit NYC building, terrace work almost always requires both a DOB permit and board approval. Many co-ops require the unit owner to use a contractor from an approved list and to carry specific insurance. Trying to do unpermitted terrace work will not just void your sponsor warranty — it can also expose you to liability if water damages the unit below. We handle the entire permit and board approval process as part of every job.
Lifespan and warranty
A properly installed terrace waterproofing system, with quality materials and meticulous detail work, lasts 15 to 25 years. Reputable installers offer 10- to 15-year written warranties. If a contractor offers only a one-year warranty, that's telling you what they actually expect from their own work.
Get a Free Flat Roof Estimate
Licensed NYC roofers. Written, itemized quote. We respond within the hour during business hours.
- GAF Certified & Firestone Licensed
- Fully licensed & insured in NY State
- Free written estimate — no pressure
- Serving all 5 boroughs since 2008
Need a roofer in NYC?
IronSky offers free estimates and 24/7 emergency service across NYC, Long Island and Yonkers.
Get Free EstimateRelated Articles
All posts
Brownstone waterproofing in Brooklyn: the 5 warning signs every owner should know — cracked mortar, efflorescence, peeling paint, musty basement, and active leaks.
Discover the most common reasons NYC flat roofs leak — from failed flashing to ponding water — and how IronSky fixes them fast. Free inspections available.
NYC Local Law 94 requires green or cool roofs on most new buildings. Learn what's required, what's exempt, costs, and how IronSky helps NYC property owners comply.